|
|
|

|
Site Index:
In This Section:
|
Bicycle FrameThis page is dedicated to chronicle the design and fabrication of my bicycle frame. I used to ride quite a lot and have had numerous bikes over the years. This frame is going to replace a Cannondale road frame I am currently using as my commuter bike. My only other bike is custom Serotta CRL. Using my "extensive" knowledge of bikes and my personal preferences in mind, I have decided to go with the following:
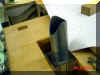
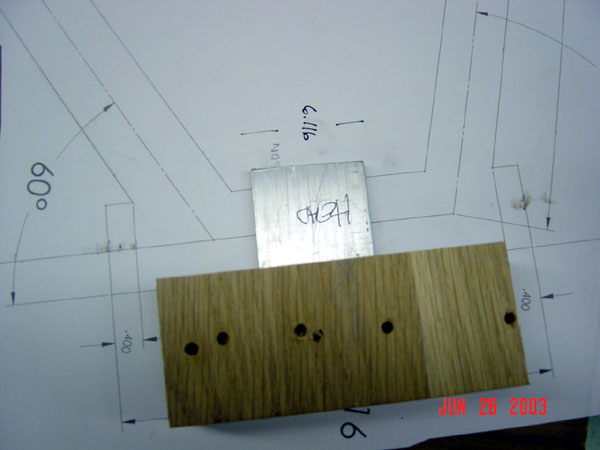
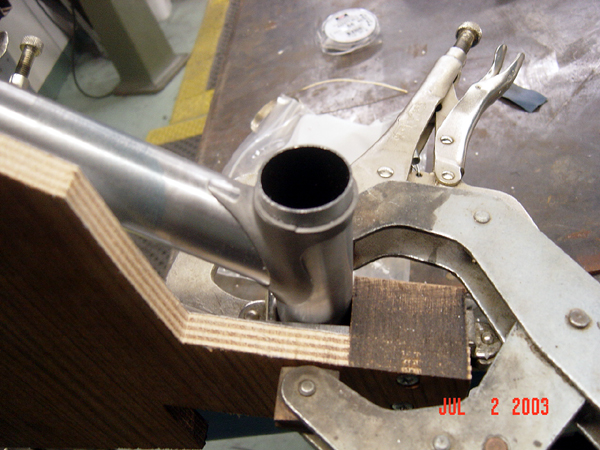
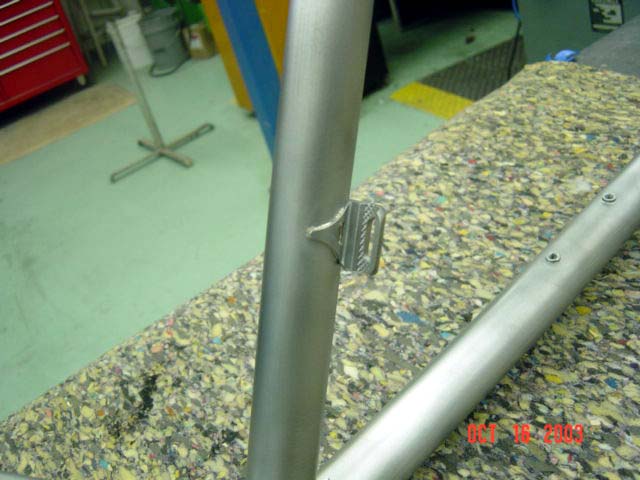
19JUN 04 I made the tube clamp blocks out of 2"x2" oak block scraps I found in a wood shop. I used Forsner ® bits to cut the 1.00", 1.125" and 1.25" holes in the blocks for the different tubing diameters. I then took the blocks to the band saw and split them to make the clamp blocks. 23JUN
04
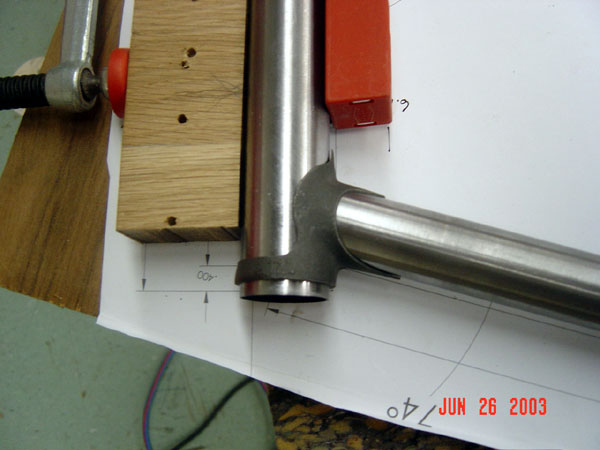
I have cut the head tube and started the top/head tube miter. I forgot how
brittle this tubing can be, filing takes no time at all. Translation - take
your time. Luckily with the advances in technology, and my being
able to use some of it, a hack saw was not needed. My cuts are straighter
and much more clean than they would have been with a hack saw. I love my
tube clamping blocks, they work like a champ!!!
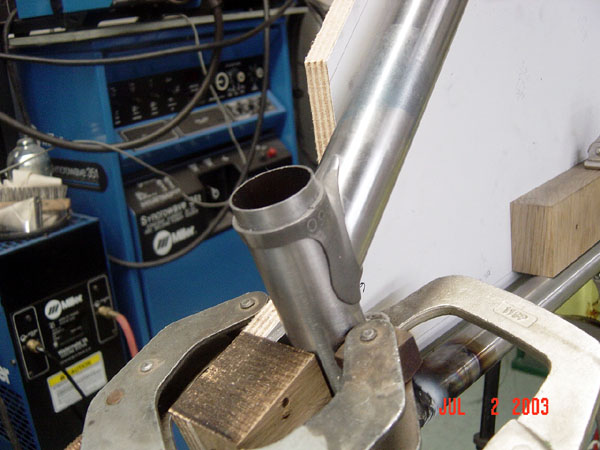
24JUN 04 I finished the first top tube miter and
started on the down/head tube miter. I am definitely taking it slow, a s
I do not want to make a wrong cut and ruin a tube...
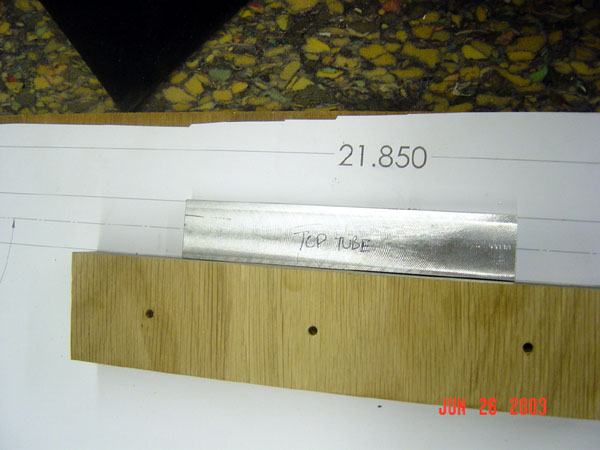
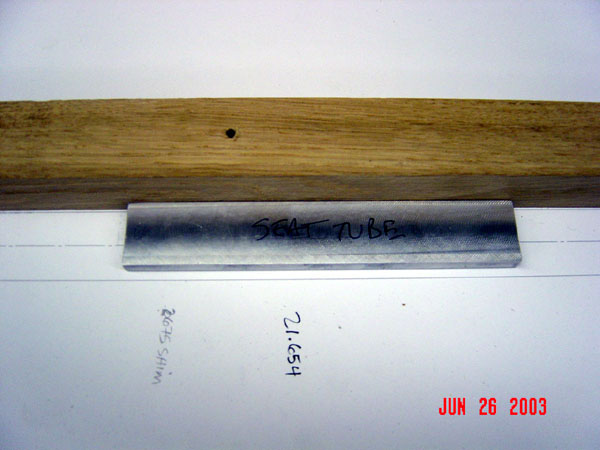
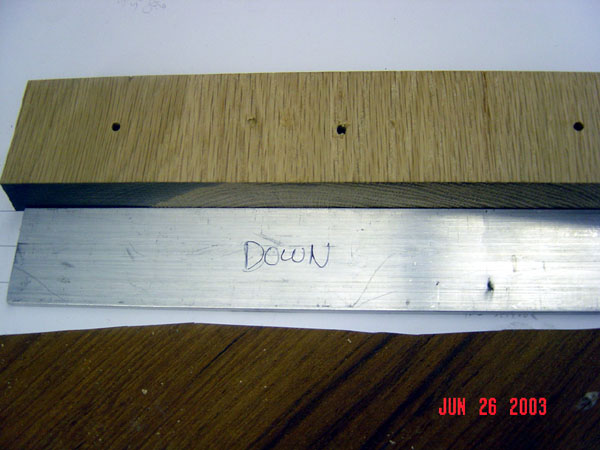
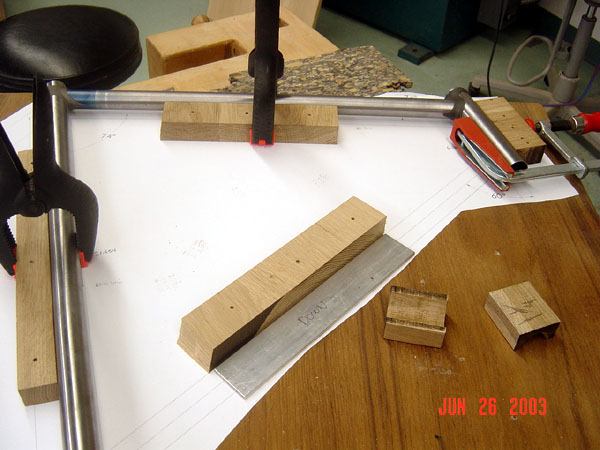
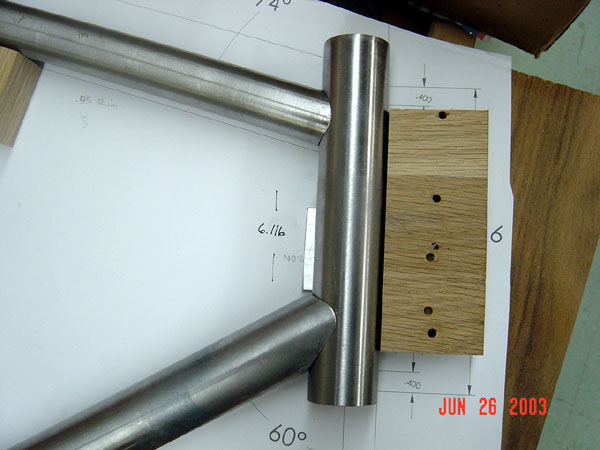
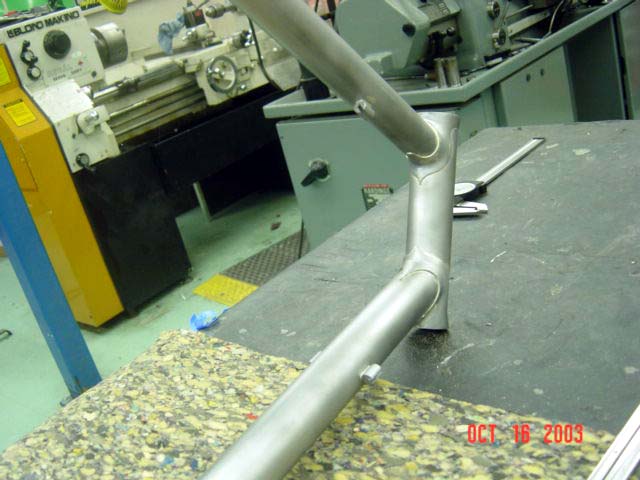
25JUN 04 Today I made the jig. I used scrap
pieces of oak as the bracing blocks to align/clamp the tubes against. I
also made the tube shims for each of the tubes. I decided to use a stock
piece of scrap aluminum (.200") thick on the 1.25" head and down
tubes. I then subtracted the difference in size from the top tube,
divided by two and added .200 to come up with a .325" shim for the
1.00" top tube. I did the same and got a .2675" shim for the
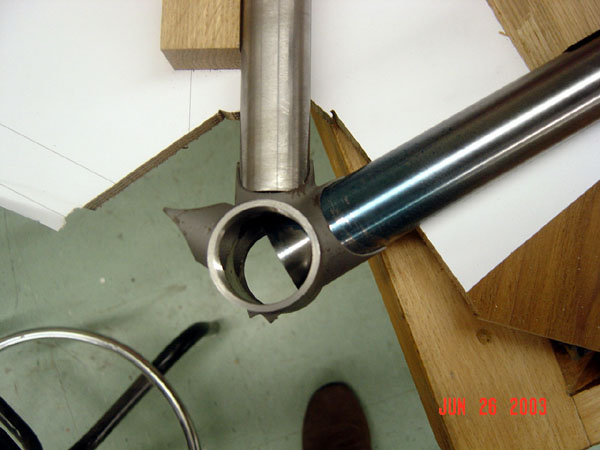
1.125" seat tube. 26JUN 04 Today I finished the down/head tube joint and
also completed the top/seat tube joint. Lots of filing to get everything
to fit just right. I started to scribe the down tube/BB joint and
realized the tubes were not properly aligned, so I decided that was a good
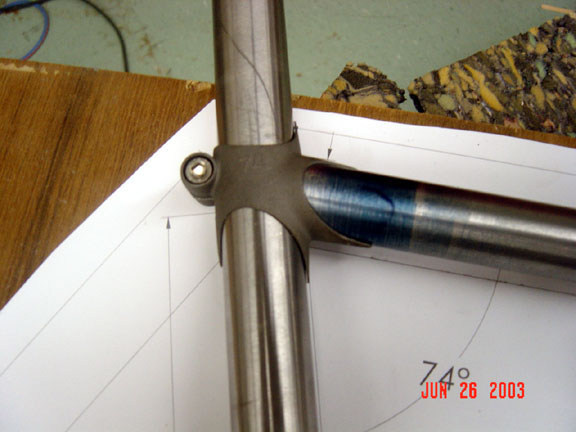
stopping point.
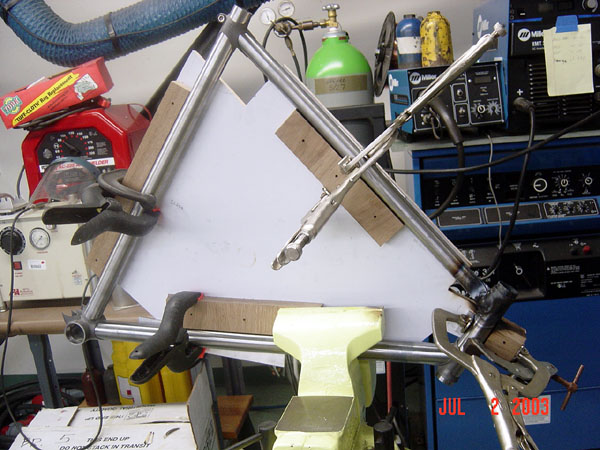
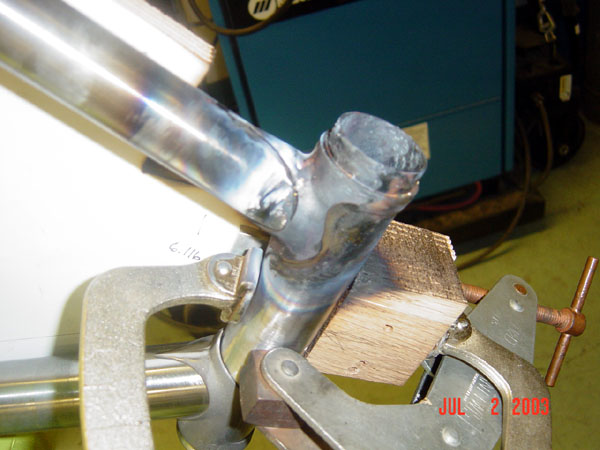
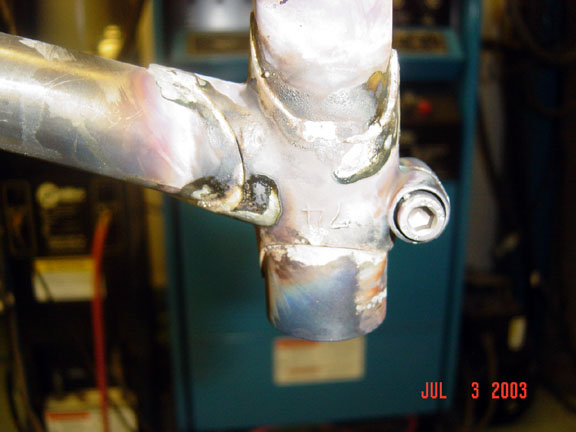
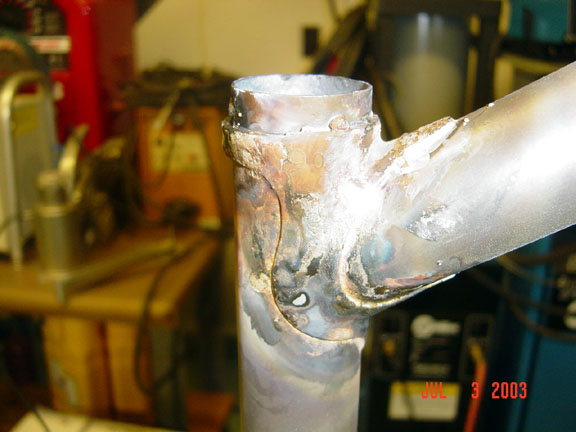
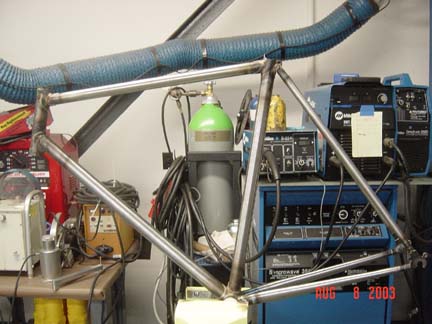
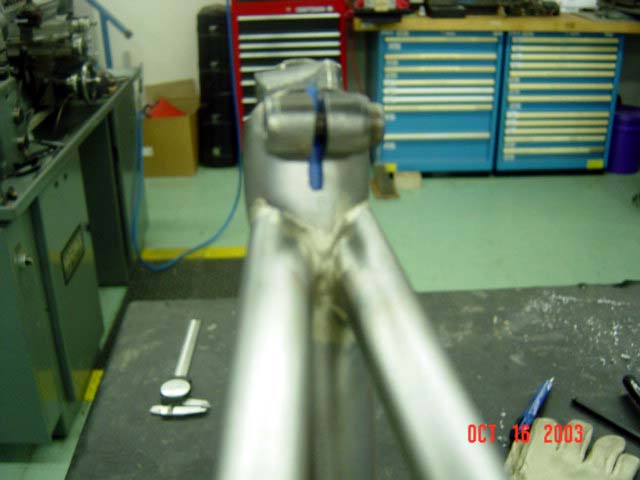
30JUN 04 Today I finished the main triangle mitering and dry fit. I then modified my jig to accommodate the frame for silver soldering. 01JUL 04 More sanding and cleaning of the tubes and lugs in preparation for joining. 02JUL 04 I attempted to silver solder today. I am using an Oxy-Acetylene torch for this process. I practiced on the two practice pieces I purchased with my frame kit. They didn't turn out so well, but I made modifications to my set-up with each attempt to get better results each time. I decided to "go for it" and attempted to silver solder the head/down tube lug. I started out okay, but then everything went down hill. I then tried the head/top tube lug with not much better results. I decide to stop there for the day.
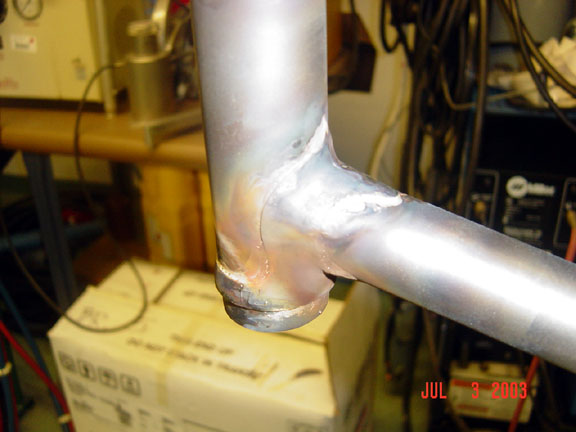
03 JUL 04 After consulting with Hank at Henry James and reading a little on the internet, I realized some more needed changes in my set up. I was using too much Oxygen. I had the gauge set at 10 when I needed 5-6 psi. Basically the excess oxygen was evaporating the Flux and therefore the silver would not flow correctly. I went to readjust the valves and realized my German equipment was in Bar, not psi. So it turns out the oxygen was set to 147 psi instead of the 5-7 I needed. Talk about too much oxygen!!!! The acetylene was at 0.8 bar so that was not too bad. I readjusted everything correctly, changed from a 0.5 mm tip to a 1.0 mm tip and tried it again. It is amazing how much differently things turned out!!! By the time I got the BB/down tube joint, it looked like I actually knew what I was doing!!!! Now I am waiting for the rear drop outs to show up so I can begin the rear triangle. Until then, I am going to be filing the excess pounds of silver off the head tube... 11JUL 04 The rear drop outs arrived today. I finished truing and dishing my rear wheel, so it looks like I am ready to begin the rear triangle. I have attached the chain stays to the rear drop outs. The trickiest part is getting the ovalized tube to line up vertically with the drop out. I also ordered a set of Riffle Files on eBay. They are not McMaster-Carr quality, but I didn't pay $200 either. 12 JUL 04 Today I cut the chain stays to length and attached the rear drop outs. I also machined a pieces of aluminum to fit inside the BB shell. This has two purposes: 1) to serve as a clamping point instead of the wooden tube blocks (that I cracked clamping too tightly); and 2) to ensure the chain stay tubes do not protrude into the BB shell more than necessary. 13 JUL 04 I attempted to attached the seat stays today. Major problem!!! The I.D. of the rear drop out attachment point and the O.D. of the seat stay are very different. I called Peter at Ceeway and ordered a set of the correct sized tubes. I used Ceeway because they are where I got the drop outs and knew they had to have matching tube kits. 25 JUL 04 I attached the seat stays to the drop out and began attaching the rear triangle. I did numerous measurements and lots of tweaking to get everything to line up properly. Finally everything looked aligned, so I cut the cut one seat stay to length and filed it into shape. 5 AUG 04 I measured and cut the drive side seat stay. Unfortunately, I cut it too short, some how I saw a different scribe mark and ruined that tube. Good think Ceeway is in England, I should have a new tube in a few days.
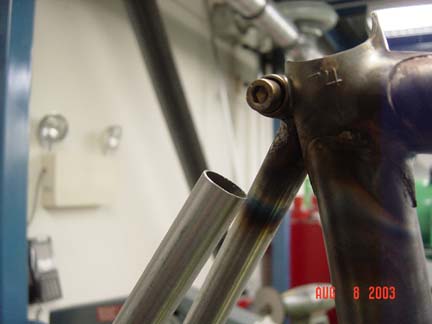
03 OCT 04 I have been out of town a lot lately, so not much to report. I finished the seat stays, finally. I changed the mounting point from the binder bolt to just below the seat tube lug. This was a cosmetic decision and the frame looks cleaner this way. I also took the frame to a local bike shop to have the head tube faced to the correct size. When that returns I will finish the cable stops and bottle cages. Begin and hopefully finish the finishing work and paint in a week or two. I am thinking about a gloss black with a small hint of glitter.
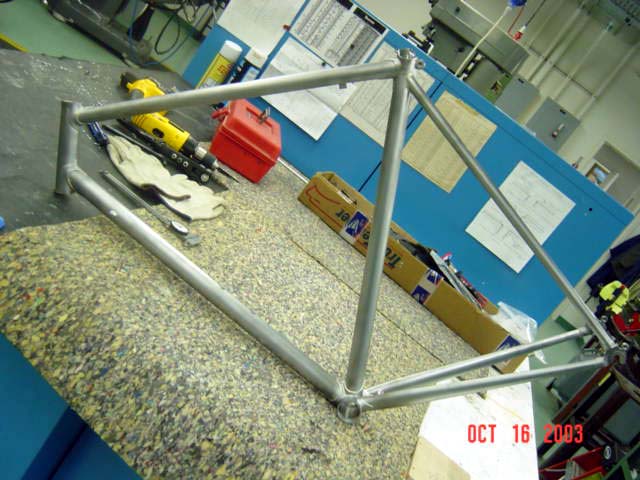
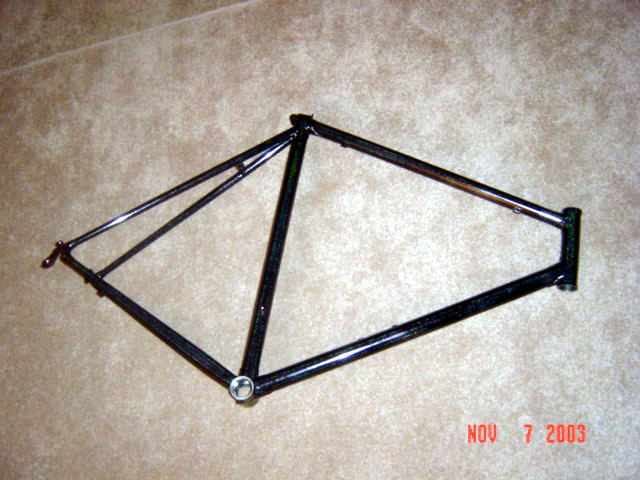
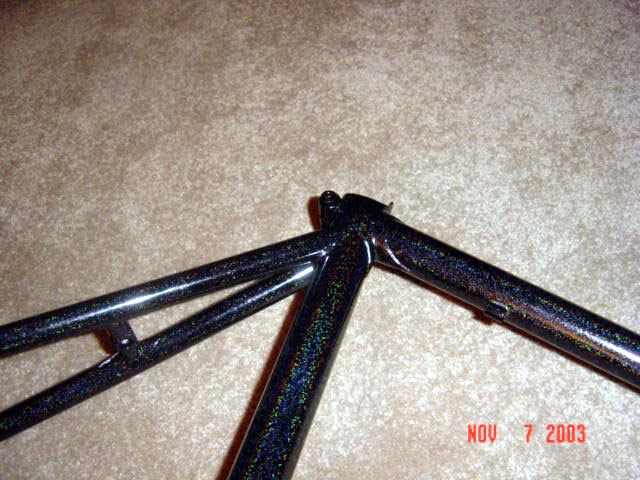
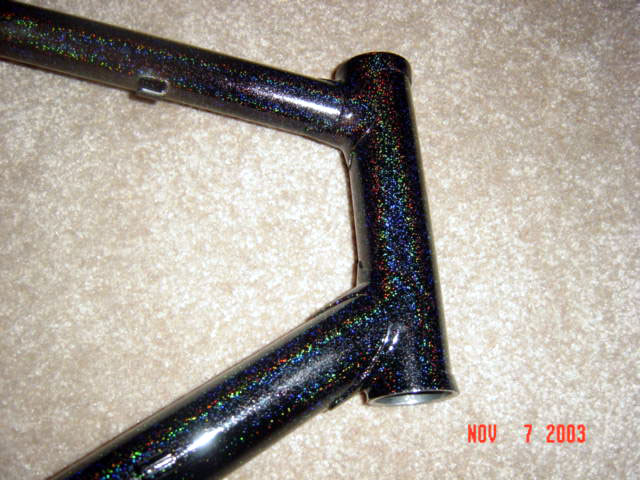
12 OCT 04 I pick up my frame last week, 25 EURO to face the head tube!!! I had left a considerable amount extra (1/2 ") on each end and was expecting to pay circa 40-50 EURO. What a bargain!!!! Today I finished most of the sanding and prep work for the painting, planned for this week. I have realized that the finish work is what makes a $700 frame a $1500 one. That and the fact that some body who does this for a living would be much more efficient at it and make fewer mistakes. I am very thankful for the sand blaster I have access to, it has made my little time each day twice as productive. I also made Delrin caps to cover the machined surfaces during the painting process. My understanding is that Delrin can withstand the powder coating temperatures of around 500 degrees. This way, they can be attached and left on for the entire painting and baking process without messing anything up. 16 OCT 04 I am pretty much ready to paint (and the frame is ready also). I think tomorrow is the big day. 03 NOV 04 I had to go on travel, so I finally got around to painting today. Check out the final product!!! Going to attempt to assemble it this weekend...
|
||||||||||||||||||||||||||||||||||||||||||||||||||||||||||||||||||||||||||||||||||||||||||||
|
Burrtech © 2004-2014 |