|
I decided to get into
the arcade arena because a
friend of mine
enlightened me to the
MAME site. I spent the good part
of six months deciding which style of cabinet to make and how. I
went with the cocktail cabinet mainly because of the weight and
space issues. I am currently living in Frankfurt, Germany and work
for the US Consulate, so weight and space are real issues when
having the US Government move me and my household effects around.
I took
the basic design that
JelloSlug has
to offer and modified it to my likings. Basically I beefed it up a
little by making all the joints mate in routed slots and built the
entire unit out of cabinet grade plywood. I made a few changes here
and there but those are the most significant ones. My drawings,
created with SolidWorks2006, can be downloaded
here. If you
are really interested, I have 3-D models I created of each piece as
well as a complete assembly in 3-D.
I chose
the
Ultimate Arcade Controls
because they offered the joysticks (4 or 8 way), buttons, and the
keyboard emulator needed to map the controls to the joysticks.
First I
began by adapting the drawings from
JelloSlug to
my engineering program and modeled it in 3-D to detect any errors in
my vision. Once that was completed I consulted a woodworker that I
know and got his opinion on MDF. Not surprisingly he was biased
towards cabinet grade plywood and talked me into making a solid
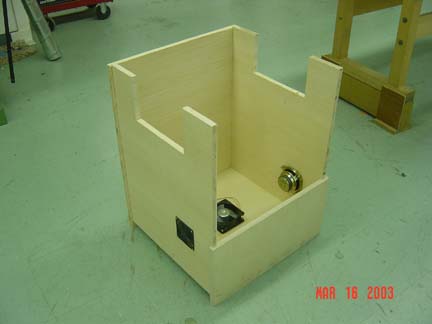
cabinet. I then began laying out the pieces on the sheet of plywood
and started making cuts. The first Piece was the front piece. I
then cut out the two identical side pieces and notched them for the
control pieces. I then routed the front piece to accept the side
pieces. Once the routing was completed (even with a guide I didn't
stay within the lines all the time). Luckily most of the errors
were on the inside edge of the cabinet so they will be less
visible. Once the side pieces were successfully dry fit, I then cut
out the rear bottom piece and routed it to match. After a
successful dry fit of the entire cabinet, to include the bottom
piece, I glued it all together and clamped the cabinet everywhere I
could possibly get a clamp. I then reinforced the pieces joints
with a brad gun.
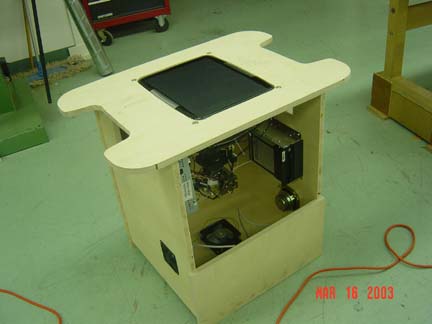
The next day, after the glue set, I
began to cut out and shape the top piece. I was hesitant to cut any
holes in the cabinet or top plate until I had the components to fit
properly. Once I finished the top piece basic shape (minus the
monitor cut out) I set out to get the fan and speakers. I also came
across an unused monitor... I cut out the holes for the speakers
and fan and attached them, again for dry fitting.
The next
day I took the monitor out of it's case and traced the display
outline onto a pieces of paper to transfer to the top plate of the
cabinet. Once transferred, I drilled a few holes on the inside of
the pattern and began cutting with a jig saw. after a few sanding
adjustments, I successfully got the monitor to fit inside the hole.
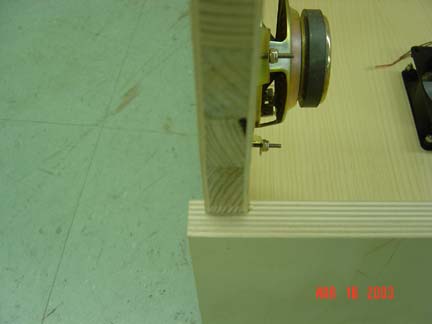
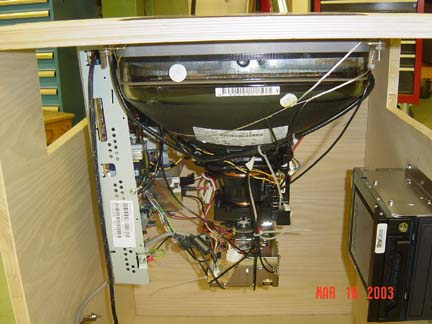
After looking at numerous web sites, I was gong to do as everyone
else did and support my monitor from the bottom up. I decided to
support my monitor from the top plate of the cabinet, mainly because
I was using solid cabinet grade plywood and it should hold... So I
counter sunk hole from the top to support the monitor and then
mounted the associated circuit board next to the monitor with
shallow wood screws. I decided to cover the top piece of the
cabinet with a thin piece of picture matte, this way it will cover
my less than stellar hole cutting for the monitor and also cover the
monitor support screws. I have ordered an over/under single coin
door assembly from
Happ Controls,
I am hoping to install that when I return from my upcoming travels.
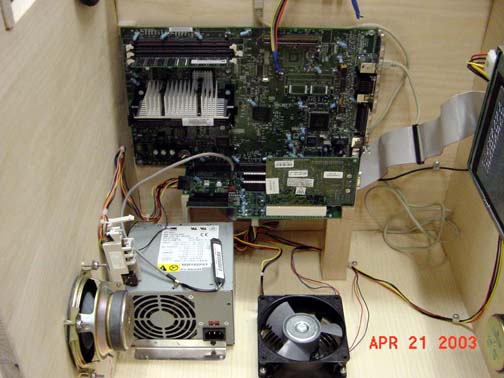
I finally got a computer (from a
neighbor) that works, a Pentium II 400 MHz with 128 MB RAM! I had
to upgrade the hard drive (4 GB) and installed Windows 2000.
Everything seems to be working fine. Although I finally got around
to checking the monitor I have already installed. One would think
that a new monitor, out of the box, would not have any issues. Well
mine does. It seems the sides bow inward after a few minutes of
being powered on. It does not really seem to affect the games,
unfortunately the only way to fix this might be to acquire a new
monitor. Hopefully it will fit into the current cut out!?!?
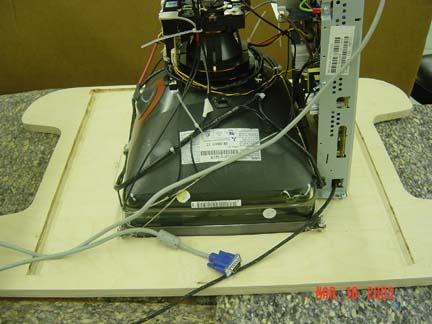
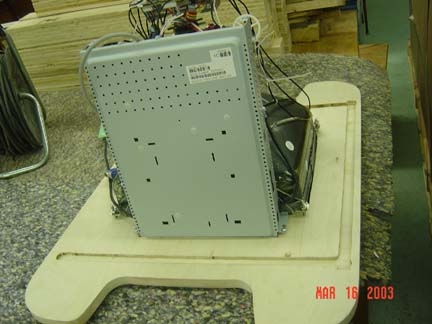
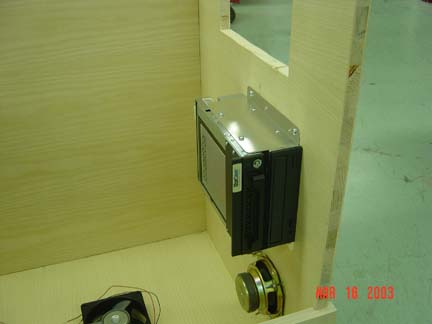
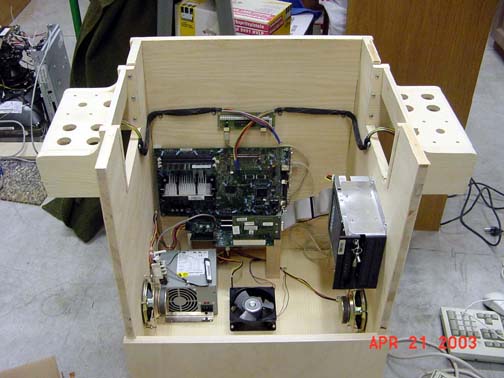
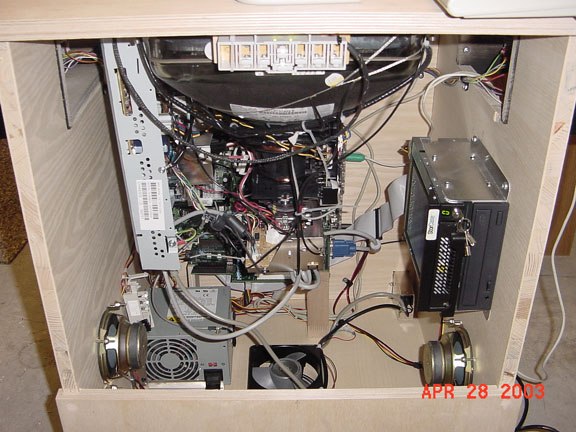
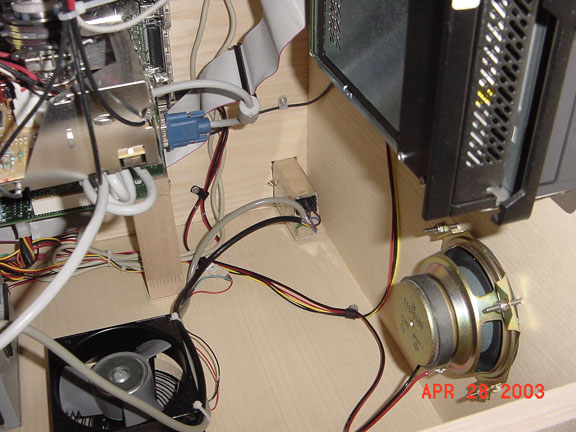
The computer is
mounted to the bottom inside of the cabinet with wood screws and
plastic washers. I mounted the power supply on the bottom of the
unit with sheet metal brackets. I have remotely mounted the hard
drive and CD-ROM drive. These two items are near the access panel
and the hard drive is in a removable tray, in case I have to do some
maintenance, I can just remove it and put it in my desktop for
repairs. Everything seems to be working now, so I am moving on to
the control panels.
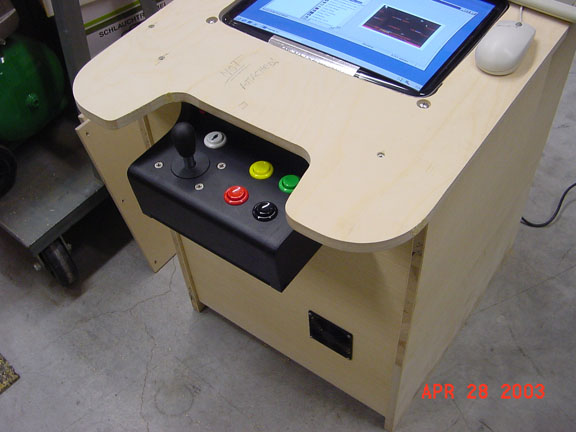
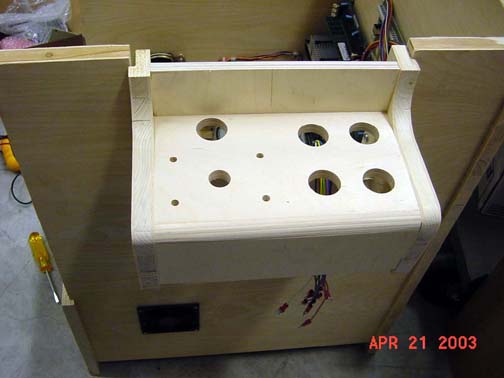
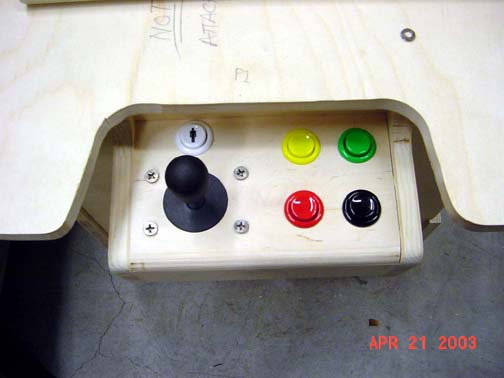
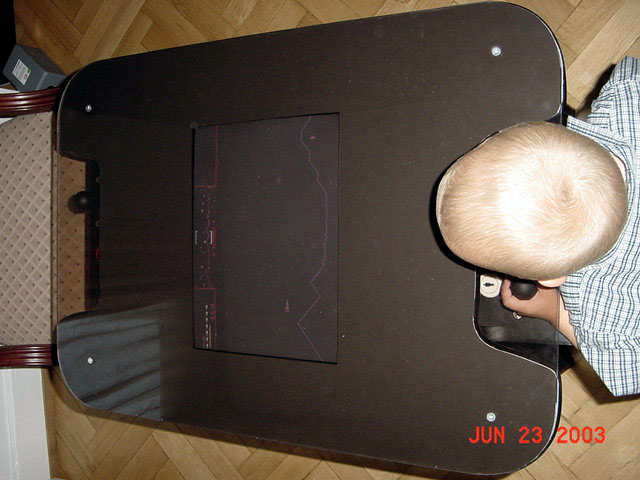
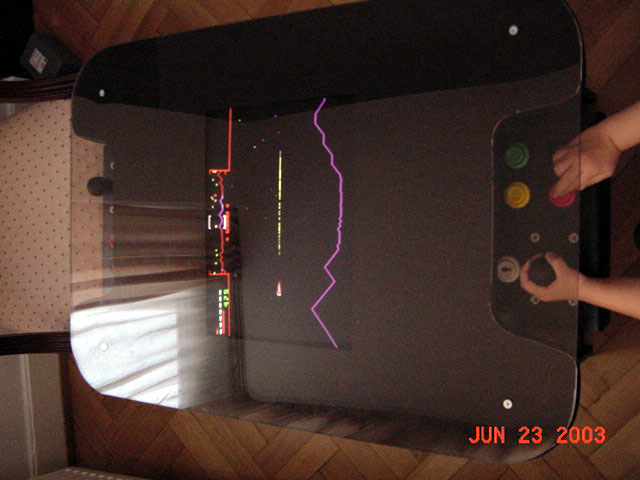
The control panels, two of them, will
each have, one 4/8 way joystick, one player control button and four
action buttons. I learned that a pneumatic brad nailer can shoot
nails at an angle, so hopefully the cosmetic blemishes on the
surface, as well as the joints, can be sanded out and/or puttied...
I attached the control panels with three long wood screws on each
side so if need be, they can be removed easily. I have yet to
decide if I want to put bottoms on the control panels. I have them
cut out, but my fear of not being able to access all the necessary
buttons and wires is preventing me from putting them on right now.
I later attached the bottom pieces with small screws so they can be
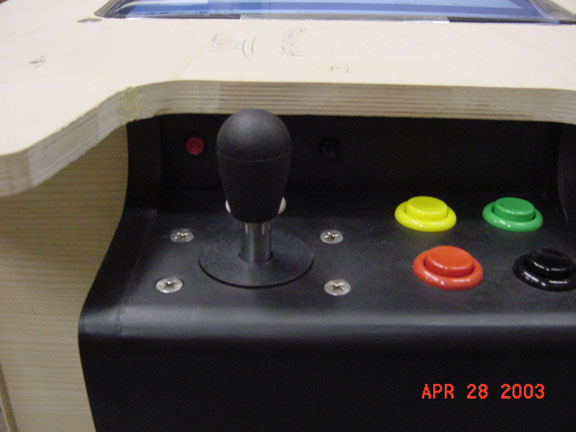
removed as needed for servicing. I have decided to go with black
for the color. Krylon to the rescue. I put three coats on the
control panels and that seems to have done the trick. The wood
sucked up the first two coats in a matter of minutes.
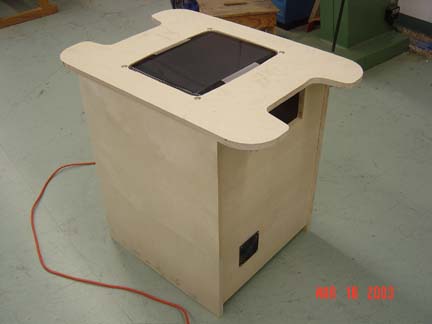
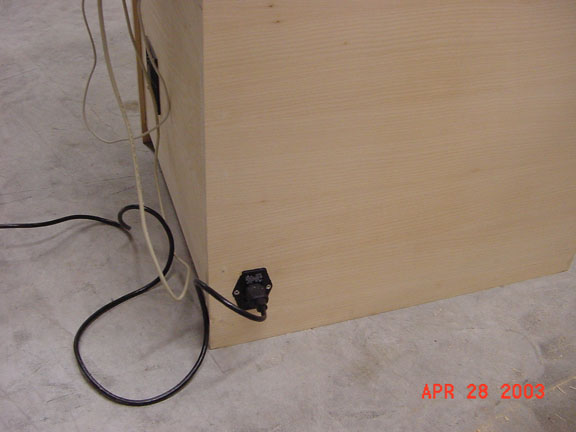
I also installed an EMI filter for the AC power coming in to the
cabinet. Why a filter? Basically I just had access to one and it
made the transition from the outside of the cabinet to the inside
that much easier and aesthetically pleasing. From the filter I
split the AC into two cables, one for the computer and the other for
the monitor. Maybe I will install a UPS when I am all finished - to
be the ultimate gamer regardless of power conditions...
I purchased 25' of smooth black T-molding from
Happ Controls.
I then ordered a 1/16" slotting cutter for my router to make the
groove for the T-molding. I finally received my slot cutter and
made the groove in the table top. I then painted both sides of the
table top black and reinstalled it on the cabinet. I then inserted
the T-molding without any problems. I needed to use a rubber mallet
to encourage the T-molding to go into the slot.. Three things I
learned: 1) don't stretch the T-molding as it will only shrink back
to original length, 2) try to avoid perpendicular angles and
T-molding, 3) keep in mind Datto'ed edges when planning for
T-molding.
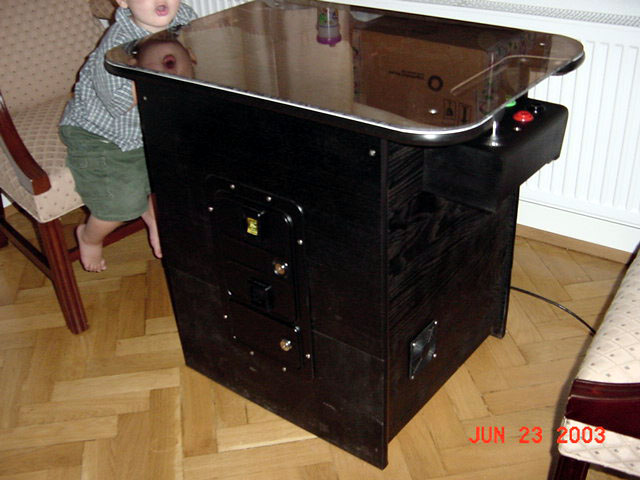
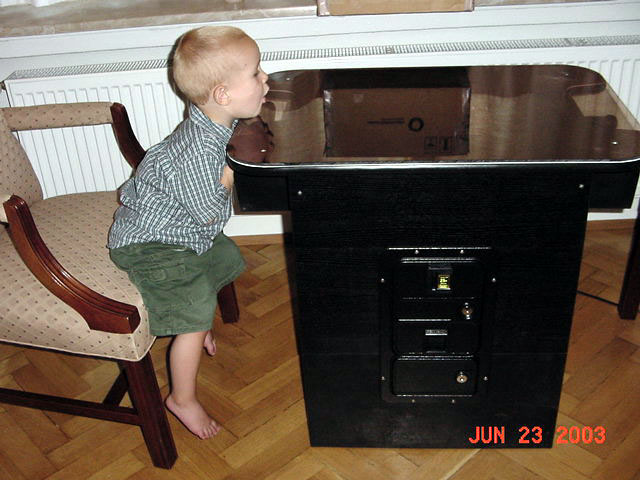
I also installed my coin door assembly. I traced the hole
pattern on the top piece and cut the hole. I then did the same on
the lower half of the side and threaded metal inserts into the
holes so I can utilize #8 machine screws without having washers and
nuts on the back side. I also did the same to attach the piece to
the cabinet, but am using #8 flat head machine screws for this
attachment.. I wired the coin and lamp assembly to power and turned
on the machine!
I
am having some issues getting all of the button mapping to
work properly, but that is a technical issue. I purchased some matte
board to cover the top of the cabinet. I used the top panel as a
guide and traced the outline on the back of the matte. As I
learned years go, be sure to use a sharp blade when cutting, and
change them often!!! Before making the final cuts, I traced the
outline on some brown packing paper to ensure I had the proper hole
location for the monitor. Once I finished with the cuts, I then
colored the white edges of the matte board with a black Sharpe ®
marker. I cut a piece of smoke colored Plexi-glass for the top
instead of glass. It is usually much cheaper and easier to work.
Make sure to run a sanding block over all the edges on both sides
as Plexi-glass can cut like paper, quick and painful. I used four
flat head wood screws to hold the top in place, after I counter-sunk
the holes. I chose the screw method instead of the metal clips
mainly because of the availability issue and the fact that my top
piece is 3/4" instead of 1" thick and simpler is easier.
Lessons Learned:
After having
played the games for a few days, I would change the following if I
were to build another cabinet.
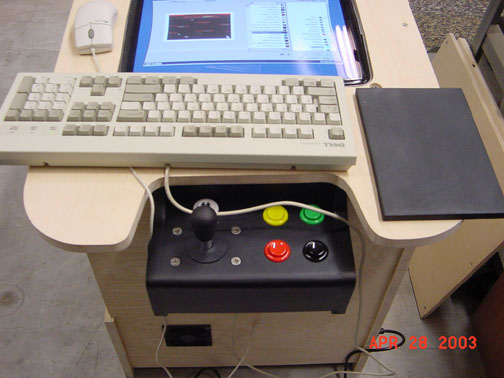
-
Increase the width of
the control panel. When I use the joy stick, my hand rests on
the edge of the control panel. After five minutes or so, my
hand begins to ache. Maybe in time I will build a callous?!?
-
RTFM -Read The
F%@king Manual. I figured out my issues mapping the buttons - I
forgot to change a jumper.
-
Make sure everything
works before you install it or make any cuts. My monitor, even
though it was new, tends to change aspect ratio on it's own. I
also installed a newer CD-ROM and my old PC does not "see" it.
Luckily the network card works and I can plug the game cabinet
into my Router and fix everything (so far).
-
Make the top panel 1"
thick. This way the joysticks will have plenty of clearance
between the top of the joystick and the bottom of the glass/plexi-glass.
I used 3/4" wood that was available and my joystick clears the
plexi-glass by 0.100". But if you lean on the plexi-glass, the
joysticks rub due to the flexing...
-
I think I would mount
the computer board and the coin assembly on the opposite sides
in which I mounted them. I think access to the computer board
is more important and since I have been having to plug a
keyboard in a few times a week, it would make it a lot easier to
do. All the examples I have seen did it the way I should have
done it, but my computer has an accessory board that is
perpendicular to the motherboard and had to be secured to the
cabinet. This precluded me from mounting it on the removable
panel.
-
I think my next
cabinet will be an upright. Some of the ROMS have issues with
Cocktail settings and switching to the other side when player 2
is up. Maybe I have bad ROMS?!?
I think that is it!!! Please
email me with
questions or comments and look for the upcoming
PC
Extreme 7, due in mid-July 2003 for
more on game cabinets!!!
05 May 07: I just sold the
arcade cabinet to a friend, so I guess I have to fabricate an
upright cabinet....
|